
Finishing the first version of an iOS app is exciting. Submitting it to the Apple App Store is the next discipline: accounts, signing, metadata, privacy details, screenshots, testing, review, and release timing all need to line up.
This guide walks through the seven practical steps teams should prepare before publishing.
Step 1: Review the App Review Guidelines early
Do not wait until the week of submission to read the App Review Guidelines. Apple's review process looks at functionality, safety, privacy, legal compliance, payments, design, and content quality.
Common preventable issues include broken login flows, placeholder content, unclear permission requests, incomplete privacy disclosures, crashes, and features that do not work as described. Treat the guidelines as product requirements, not a final checklist.
Step 2: Join the Apple Developer Program
To publish on the App Store, you need to join the Apple Developer Program. If you are enrolling as an organization, make sure legal and account details are ready because verification can take time.
Set up account ownership carefully. The Apple ID tied to the developer account should be managed as a company asset, with clear access for the people responsible for builds, certificates, App Store Connect, and finance.
Step 3: Configure identifiers, signing, and capabilities
In the Apple Developer Portal, configure the bundle identifier and any capabilities your app needs, such as push notifications, Sign in with Apple, associated domains, or app groups. The bundle ID is the unique identifier for the app and is difficult to change later.
In Xcode, connect your Apple account and use automatic signing if it fits your workflow. For many teams, automatic signing reduces certificate and provisioning mistakes. For more complex setups, document who owns signing assets and how CI builds are produced.
Step 4: Create the app record in App Store Connect
Log in to App Store Connect and create a new app record using the bundle ID you configured. Prepare the public listing before upload day so you are not writing critical copy under pressure.
You will typically need the app name, subtitle, description, category, keywords, support URL, screenshots, optional app preview videos, pricing or availability settings, and privacy information. If your app requires login, include review credentials or clear instructions for Apple's review team.
Step 5: Test the app like a reviewer and a first-time user
Before archiving, test the app on real devices and supported OS versions. Walk through onboarding, login, purchases, permissions, empty states, error states, offline behavior, push notifications, and any account deletion or data export flows that apply.
Use beta testers and in-app bug reporting to capture issues with screenshots, logs, device data, and reproduction steps. Add a feedback survey after key onboarding moments so early users can tell you where the app feels unclear.
Step 6: Archive and upload the build
In Xcode, choose a generic iOS device as the destination, then create an archive from the Product menu. Validate the archive, resolve any signing or capability issues, and upload it to App Store Connect.
Once Apple processes the build, select it in your App Store Connect app record. This may take a little time, so plan the upload before your intended review deadline.
Step 7: Submit, review, and release
After the build, metadata, privacy details, and review notes are complete, submit the app for review. If Apple asks for clarification or rejects the build, respond with precise information and fix the underlying issue before resubmitting.
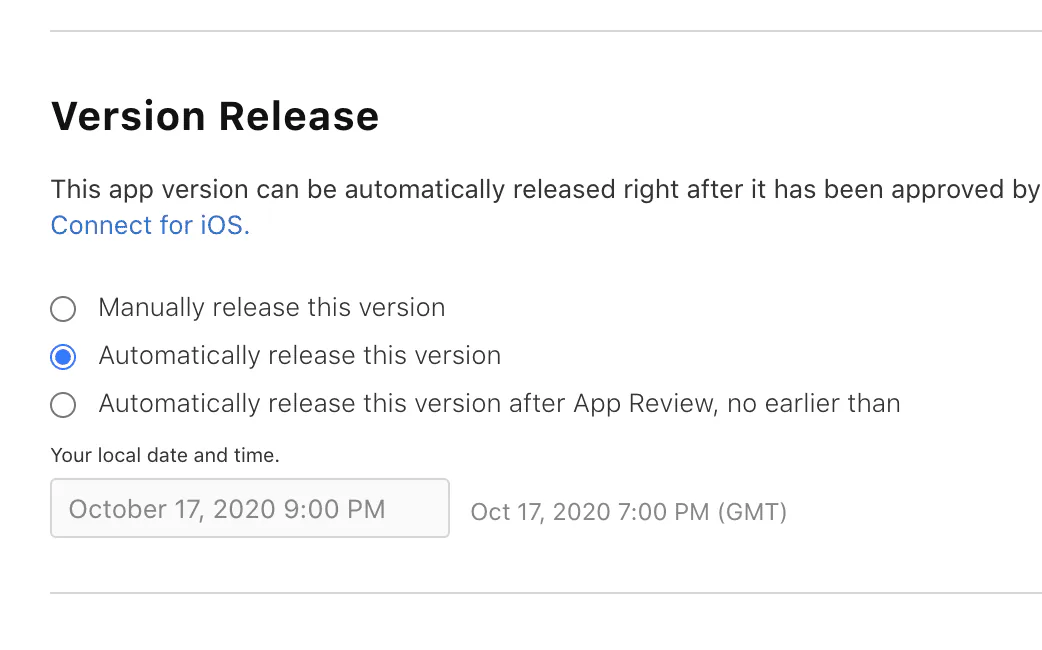
When the app is approved, choose the release mode that fits your launch plan: manual release, automatic release, or scheduled release. After launch, monitor crash reports, support conversations, app reviews, and release notes feedback so the next update is easier than the first one.